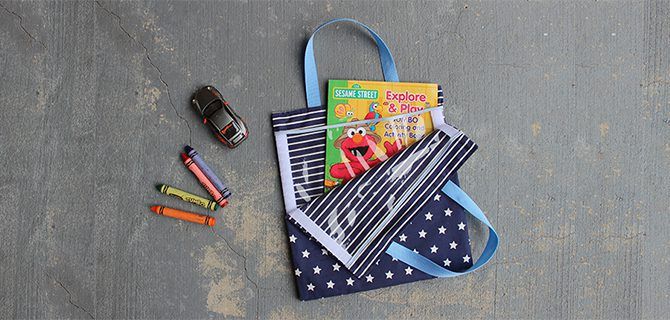
Keep your little ones entertained for hours with this easy DIY busy bag for toddlers.
In this intermediate sewing tutorial, we’ll show you how to make a busy bag with our VELCRO® Brand Sew On Fasteners.
Perfect for parents on the go, this busy bag allows you to take your kid’s activities, like coloring books and more, from errand to errand, leaving your kids enriched and happy!
What You’ll Need:
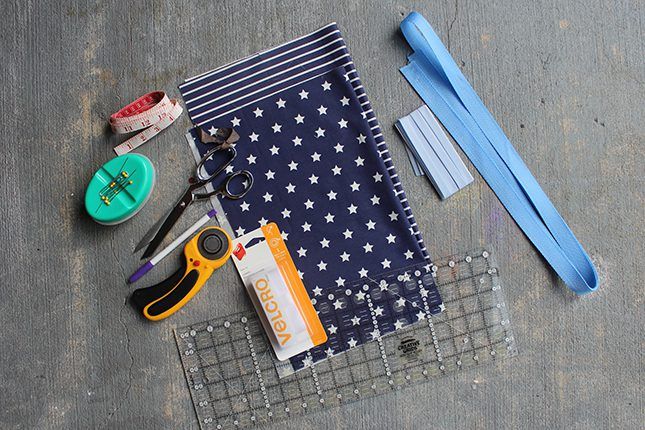
- Cotton fabric – 2 colors, 1/2 yard of each
- Fusible interfacing – 1/2 yard
- VELCRO® Brand Sew On Fasteners
- Clear vinyl – 8 gauge, 1/2 yard
- Webbing for straps – 1/2 yard
- Bias tape – double-wide bias tape (27″)
- Sewing supplies – Sewing Machine, Thread, etc
- Disappearing fabric ink pen
- Iron and ironing board
- Quilting clips (optional)
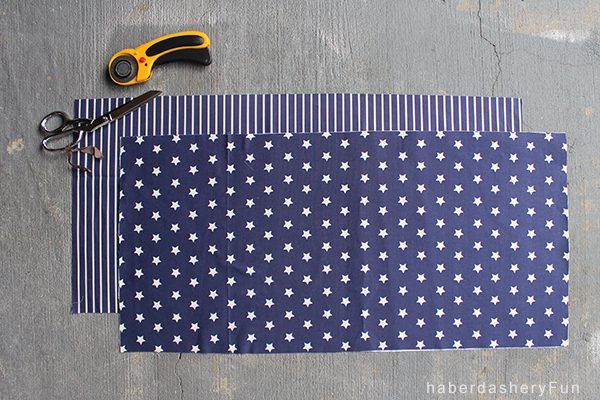
PREP YOUR CRAFT: Cut your pieces
- Main and lining fabric – 2 pieces 29” L x 13-1/2” W
- Fusible interfacing – 2 pieces 29” L x 13-1/2” W
- Clear vinyl – 1 piece 22” L x 13-1/2” W
- VELCRO® Brand Sew On Soft & Flexible Fasteners – 2 pieces 12” long
- Webbing – 2 pieces 16” long
- Bias tape – 2 pieces 13-1/2” long
*Remember that pins will leave holes in the vinyl, so pin carefully.
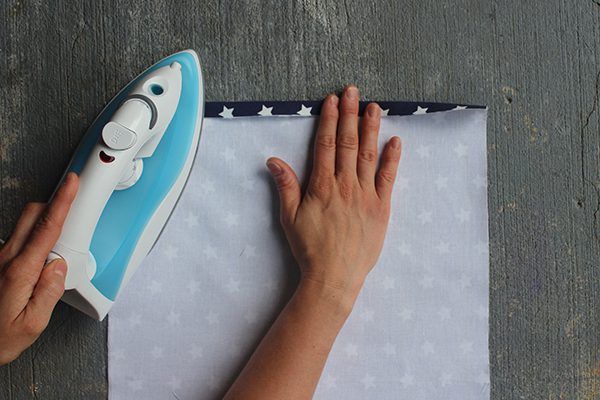
The Interfacing
STEP 1: Fuse the interfacing to the main and lining fabrics’ wrong sides.
STEP 2: Turn and fold the short end’s in a 1/2”. This is for both the main and lining pieces. Press in place with an iron.
The Vinyl Pockets
STEP 3: Place the clear vinyl on your work surface. Cut to length 12” of hook and loop on the vinyl (see image below). Then place on opposite sides of the fabric.
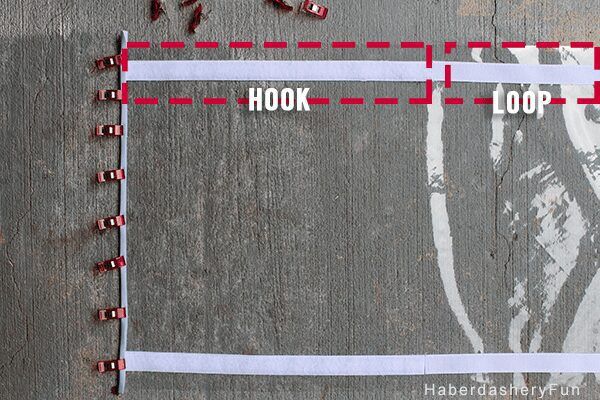
Secure with pins or clips and stitch the VELCRO® Brand Tape down.
Repeat this process on the opposite edge of the vinyl.
STEP 4: To make sure the vinyl fabric doesn’t rip, cover the raw edges with bias tape. Place the tape along the short sides, covering the fastener’s ends.
Secure with pins or clips and sew in place. Don’t forget to cut off any excess bias tape!
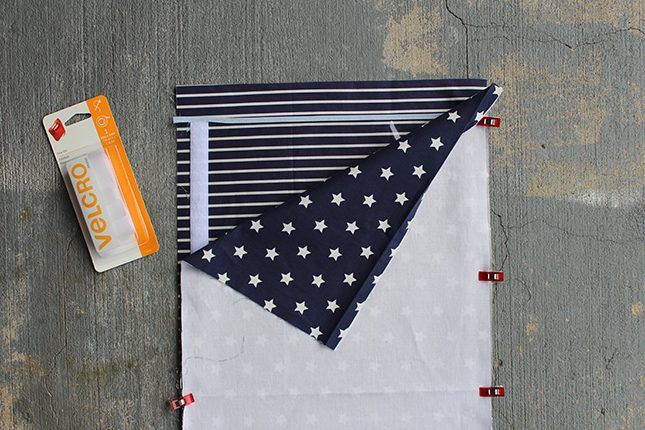
STEP 5: To construct the pockets, you’ll want to sandwich your fabric. Thevinyl fabric should be placed between the lining and outer fabrics, making sure the VELCRO® Brand Tape is facing down.Pin or clip in place.
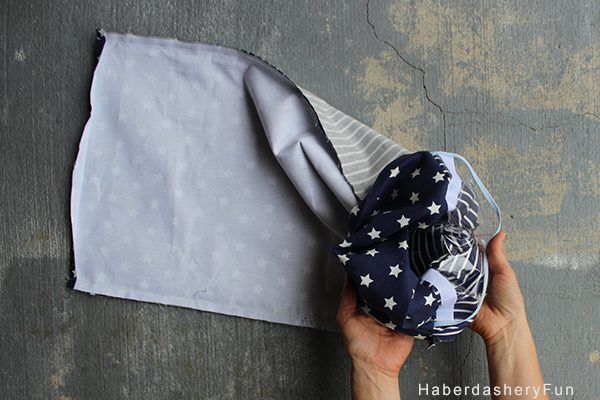
STEP 6: Now it’s time for the fun part! Stitch the long sides together, leaving a 1/2” seam and backstitch each end.
Next, gently pull the fabric right side out.
The Strap
STEP 7: To make the straps, decide on the length and make sure the straps can be folded under the bag at least a 1/2”.
Measure inwards 3” from each side and insert the webbing strap—pin in place.
Stitch along the end to secure the straps. Repeat this step to make the second strap.
The Final Touches
STEP 8: To create the bottom of the bag, find the bag’s center, mark it and stitch the line.
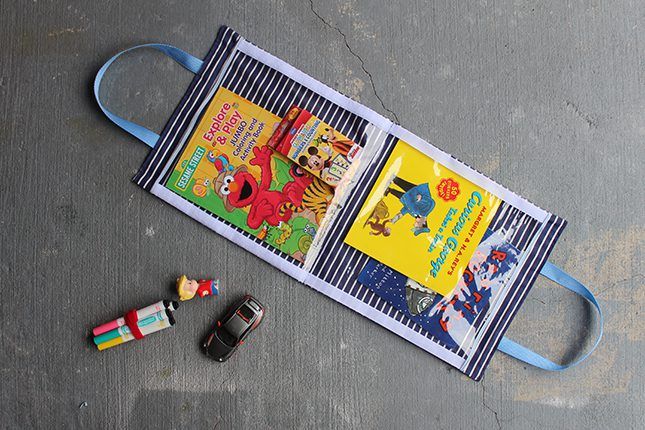
And that’s it! Your kids will be overjoyed with this DIY busy bag!
If you’d like to try this sewing tutorial yourself, pick up a pack of VELCRO® Brand Sew On Fasteners. And for more easy sewing projects, stay on our blog!


